 华为云云耀云服务器L实例评测|Git 私服搭建指南
# 前言
本文为华为云云耀云服务器L实例测评文章,测评内容是 云耀云服务器L实例 Git 私有服务器搭建指南
系统配置:2核2G 3M Ubuntu 20.04
我们平时在使用代码托管服务的时候,可能某些代码托管平台对成员有限制,或是可能会对仓库进行封禁,这些问题然我们非常苦恼。这个时候搭建 Git 私服不失为一种不错的替代方案
下面将会讲解两种搭建 Git 私服方式:GitLab 私服和 Codeup 平台
# 云服务器
本章节主要讲解 云耀云服务器L实例 购置过程中的细节步骤,并且会给出合适的配置建议
首先点击以下链接进入华为官方服务器实例购买首页
官方链接:云耀云服务器L实例 _【最新】_轻量云服务器_轻量服务器_轻量应用服务器-华为云 (huaweicloud.com) (opens new window)
然后的话按照如下配置即可,这里博主推荐的是 CentOS 7.9 ,比较稳定

其中实例规格的话,对于个人学习使用,或者是搭建访问量不高的网站 2 核 2 G 的话基本够用
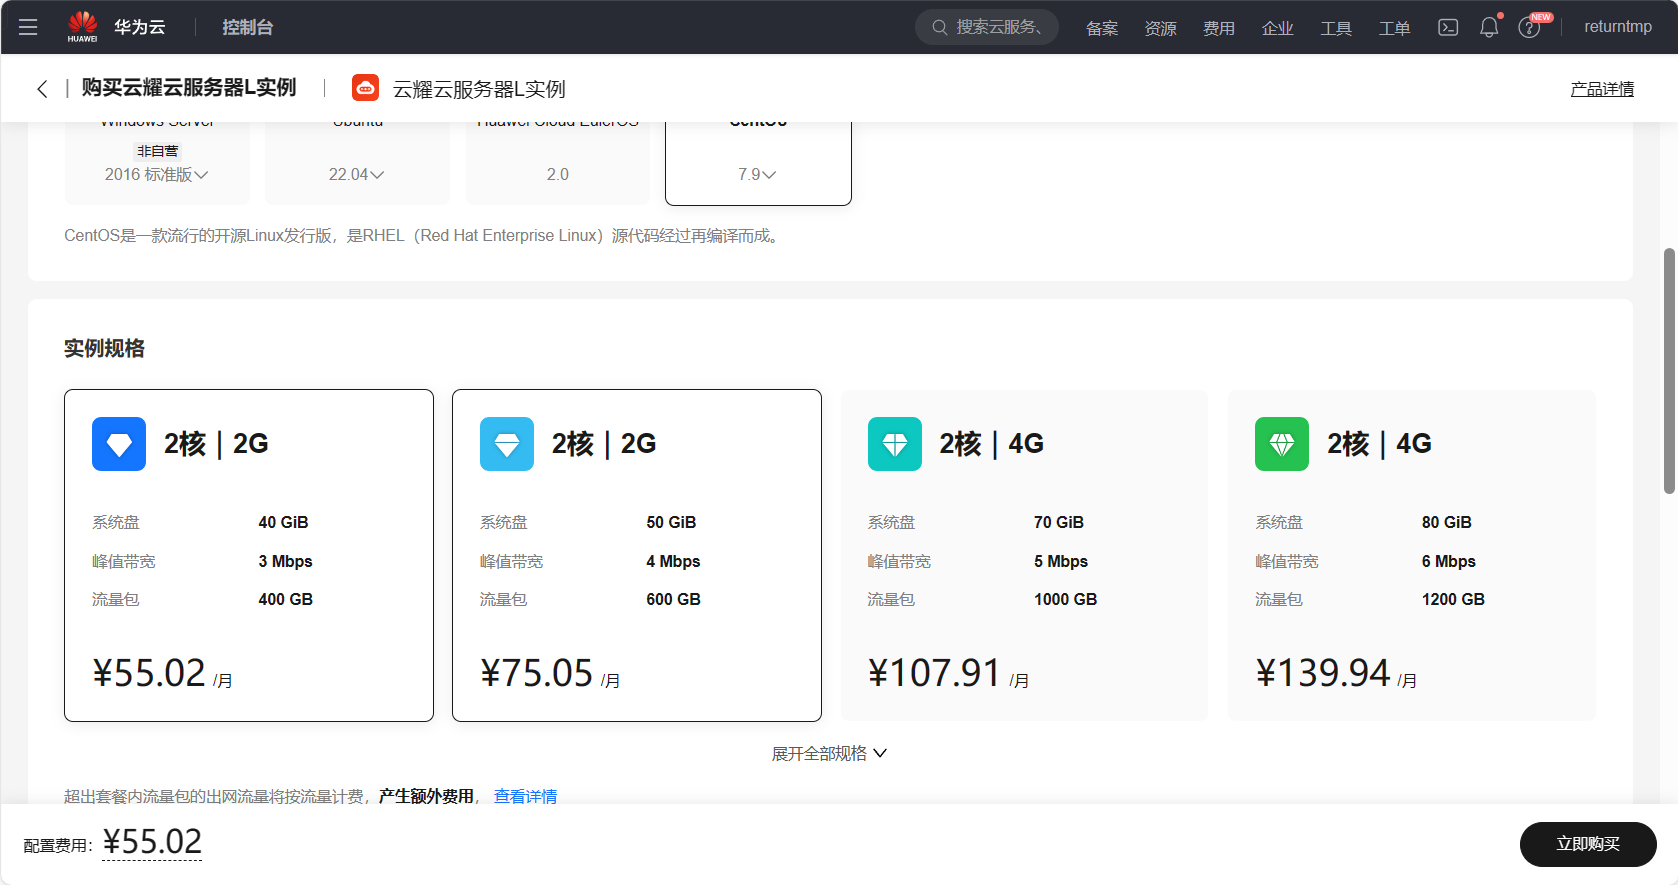
您也可以根据需要增加数据盘、开启主机安全、开启云备份等定制化的服务,最后点击购买即可,然后就可以进入下一章节搭建私服了
# GitLab 私服
# 简介
GitHub 和 GitLab 都是基于 Git 的开发流程代码托管平台。两者的区别是 GitHub 有私有仓库和共有仓库,私有仓库一般收费。GitLab 打破这种限制,可以免费搭建私有仓库,并且可以部署在自己的服务器上。GitLab 不仅有 GitHub 的功能,还有更多的优秀特性,比如权限设置。一般企业内部软件产品用 GitLab 是更好的选择,如果是开源产品,一般放在 GitHub 上。
# Ubuntu
Ubuntu 20.04
# 依赖配置
配置依赖
sudo apt-get update -y
sudo apt-get install -y curl openssh-server ca-certificates postfix
2
系统防火墙中打开 HTTP、HTTPS和 SSH访问 (可选,不设置则只能从本地网络访问 )
sudo systemctl enable sshd
sudo systemctl start sshd
sudo firewall-cmd --permanent --add-service=http
sudo systemctl reload firewalld
2
3
4
开启 Postfix 以发送电子邮件通知 (可选)
sudo systemctl enable postfix
sudo systemctl start postfix
2
# 开始安装
清华镜像官网:gitlab-ce | 镜像站使用帮助 | 清华大学开源软件镜像站 | Tsinghua Open Source Mirror (opens new window)
然后获取您的系统对应版本的安装命令
首先信任 GitLab 的 GPG 公钥:
curl https://packages.gitlab.com/gpg.key 2> /dev/null | sudo apt-key add - &>/dev/null
touch /etc/apt/sources.list.d/gitlab-ce.list
echo "deb https://mirrors.tuna.tsinghua.edu.cn/gitlab-ce/ubuntu focal main" | sudo tee -a /etc/apt/sources.list.d/gitlab-ce.list
2
最后安装 gitlab-ce
sudo apt-get update
sudo apt-get install gitlab-ce
2
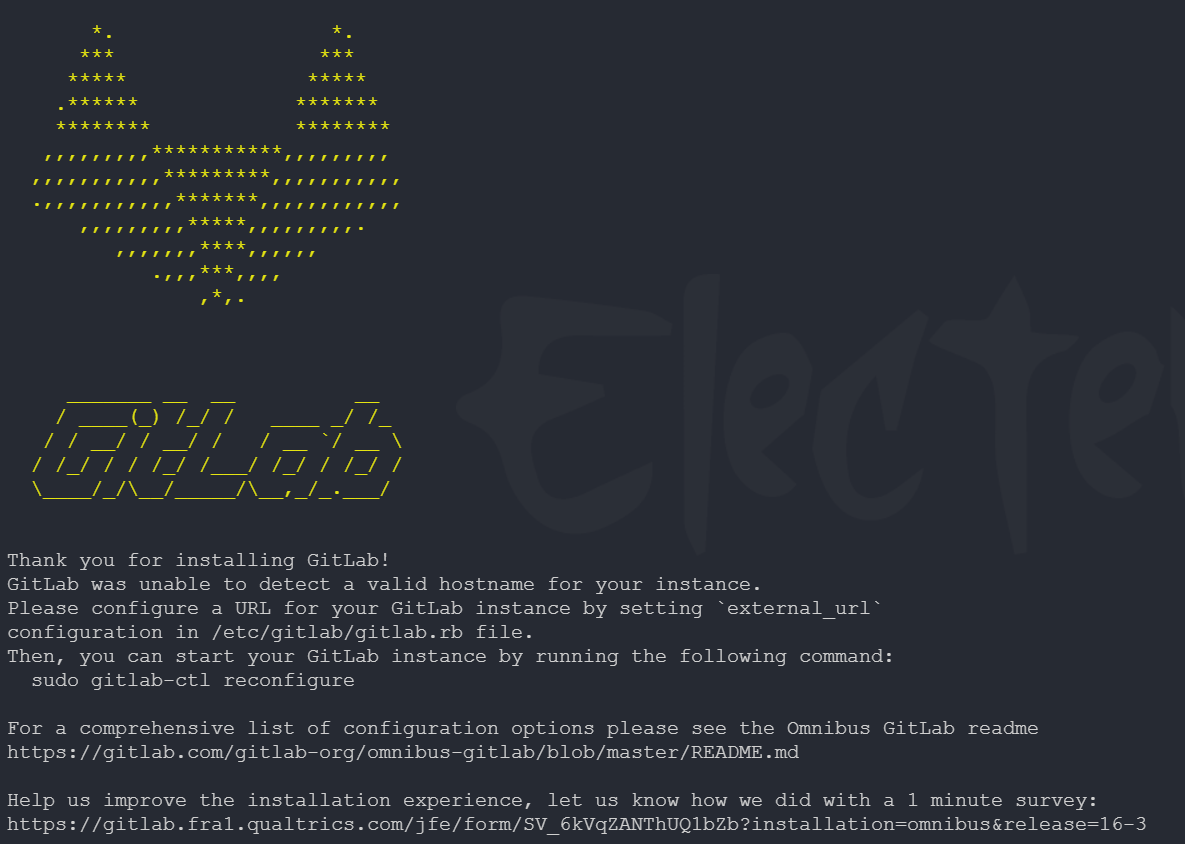
安装成功
配置端口及网址
进入文件 /etc/gitlab/gitlab.rb,进行如下配置
# 编辑文件
vim /etc/gitlab/gitlab.rb

external_url 'http://gitlab.example.com'
# 更改为如下
external_url 'http://<本机ip>:8899'
2
3
4
5
6
重新配置
sudo gitlab-ctl reconfigure
# 开启应用
sudo gitlab-ctl start
2
3
但是这里重新配置很容易卡住,可以使用如下命令解决
nohup /opt/gitlab/embedded/bin/runsvdir-start &
gitlab-ctl reconfigure
2
配置成功
# 登录应用
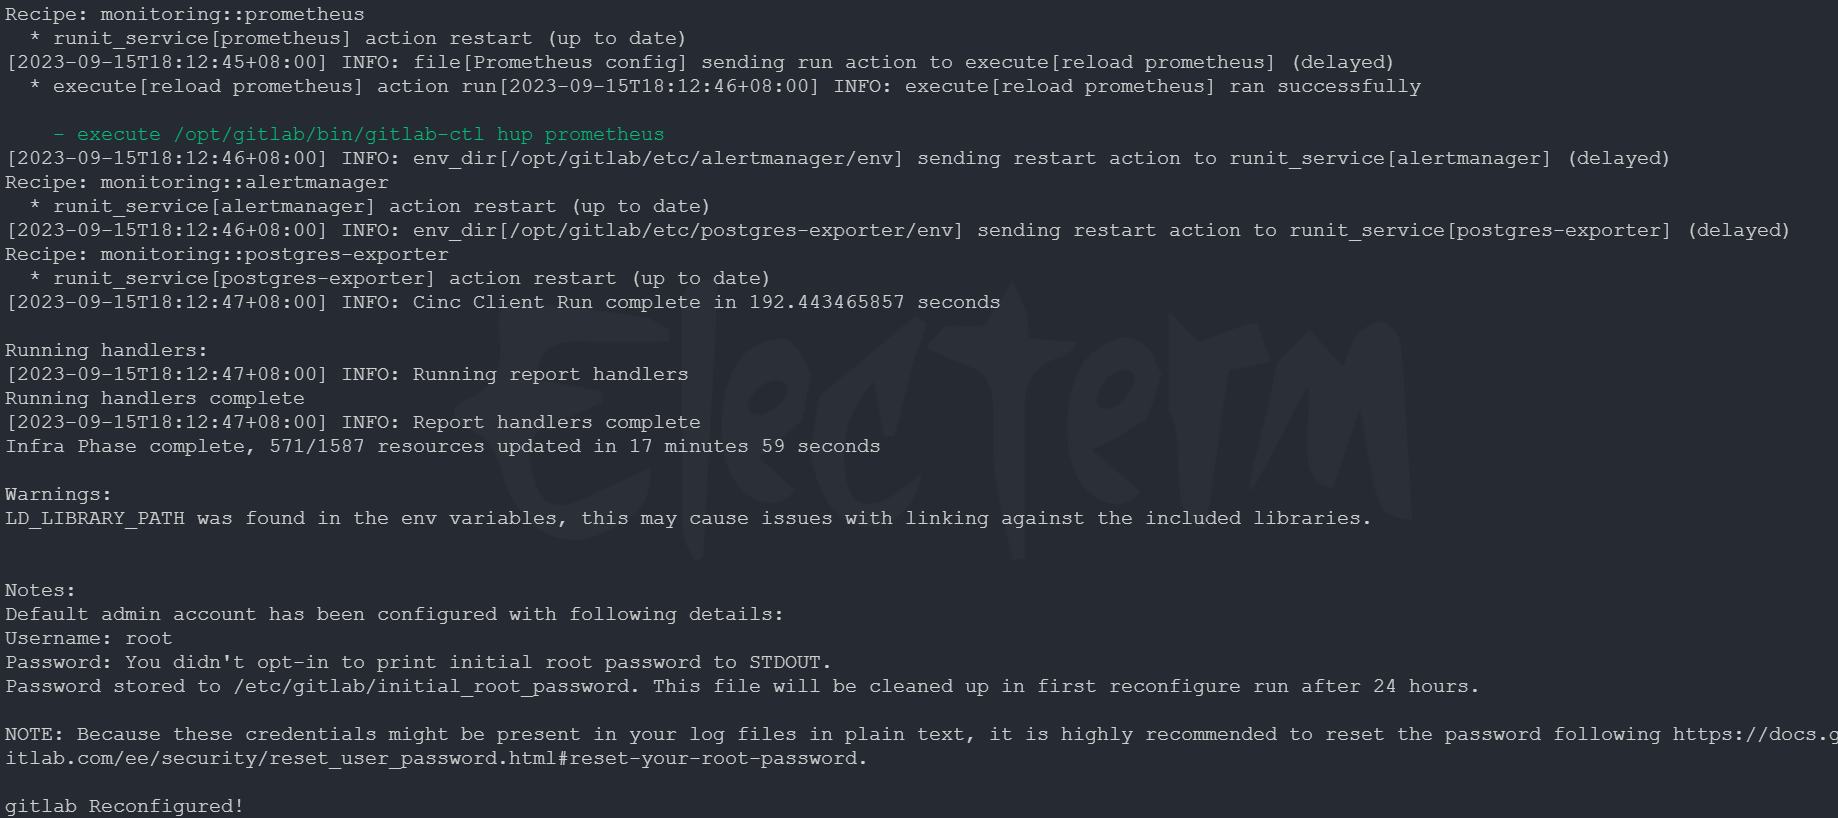
我们注意到上面我们使用 sudo gitlab-ctl reconfigure 之后控制台出现的的下面的信息
Notes:
Default admin account has been configured with following details:
Username: root
Password: You didn't opt-in to print initial root password to STDOUT.
Password stored to /etc/gitlab/initial_root_password. This file will be cleaned up in first reconfigure run after 24 hours.
2
3
4
5
上述输出表示在 GitLab 中,默认的管理员账户的用户名是"root",密码被存储在/etc/gitlab/initial_root_password文件中。同时该文件将在首次重新配置运行后的24小时内被清除。
访问之前 external_url 设置的网址,如果是在云服务器上的话,需要开启安全组和对应防火墙
sudo ufw allow <端口>
sudo ufw deny <端口>
# 关闭 ufw
systemctl stop ufw.service
2
3
4
但是访问之后出现 502 We're sorry. GitLab is taking too much time to respond. 问题
# 502 解决方案
vim /etc/gitlab/gitlab.rb
# 添加下面一行(14.x以下)
unicorn['port'] = 8088
# 14.x 及其以上
puma['port'] = 8088
2
3
4
5
重启应用
gitlab-ctl reconfigure
gitlab-ctl restart
2
还有问题就查看端口是否被占用,或是内存是否不足
# 成功访问
最后终于成功访问 GitLab 页面
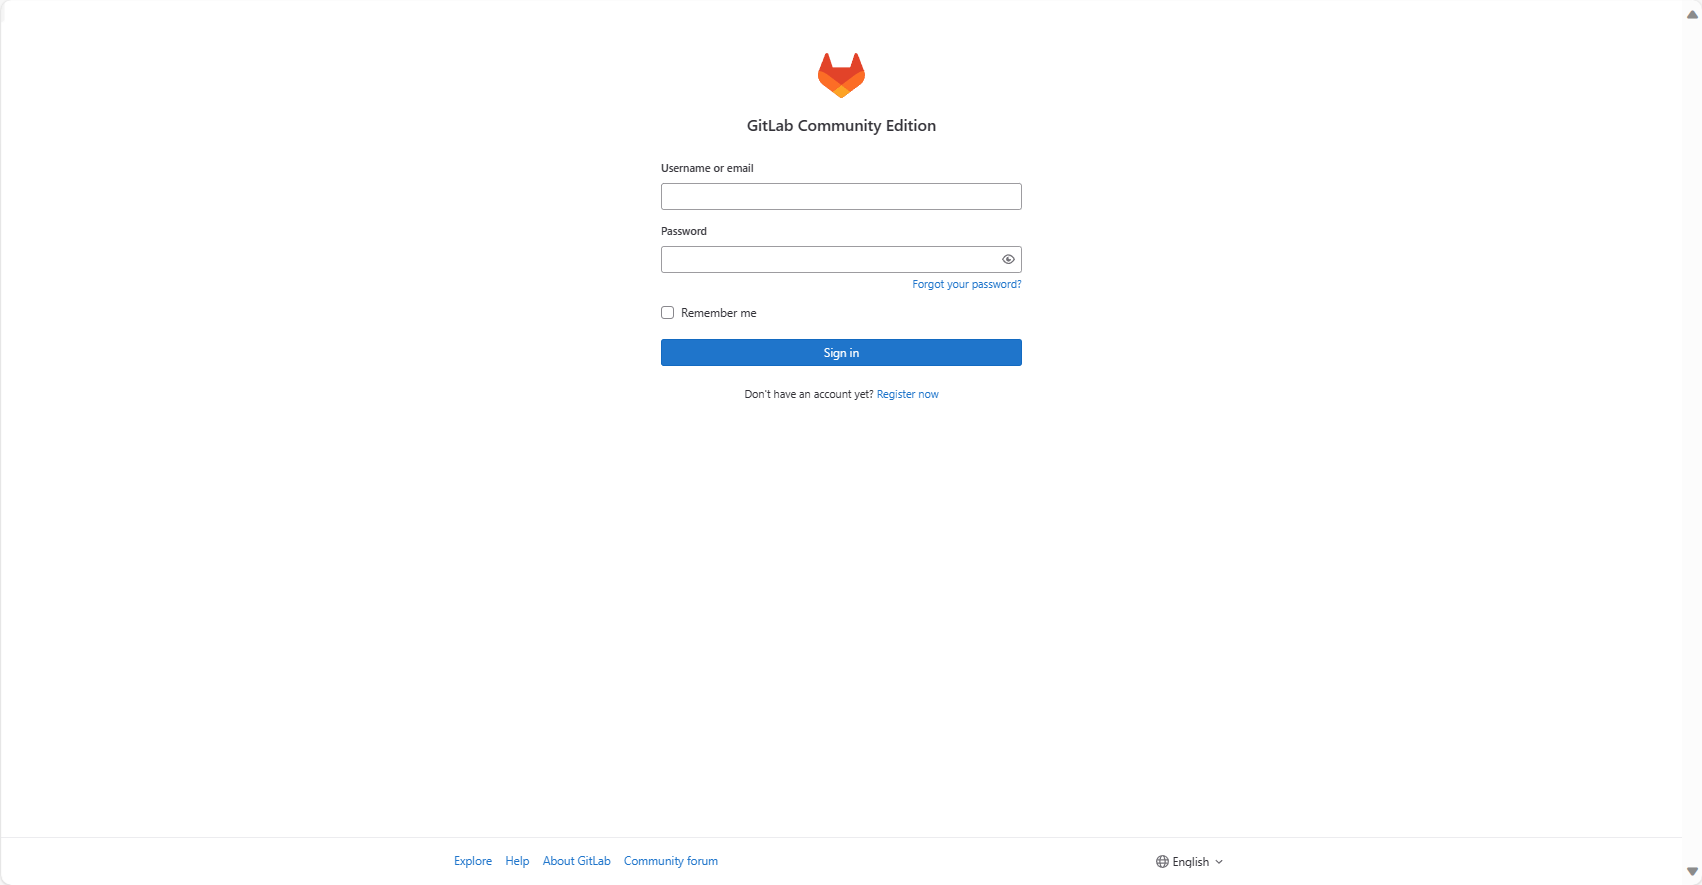
查看 root 用户密码,登录之后尽量更改密码
cat /etc/gitlab/initial_root_password
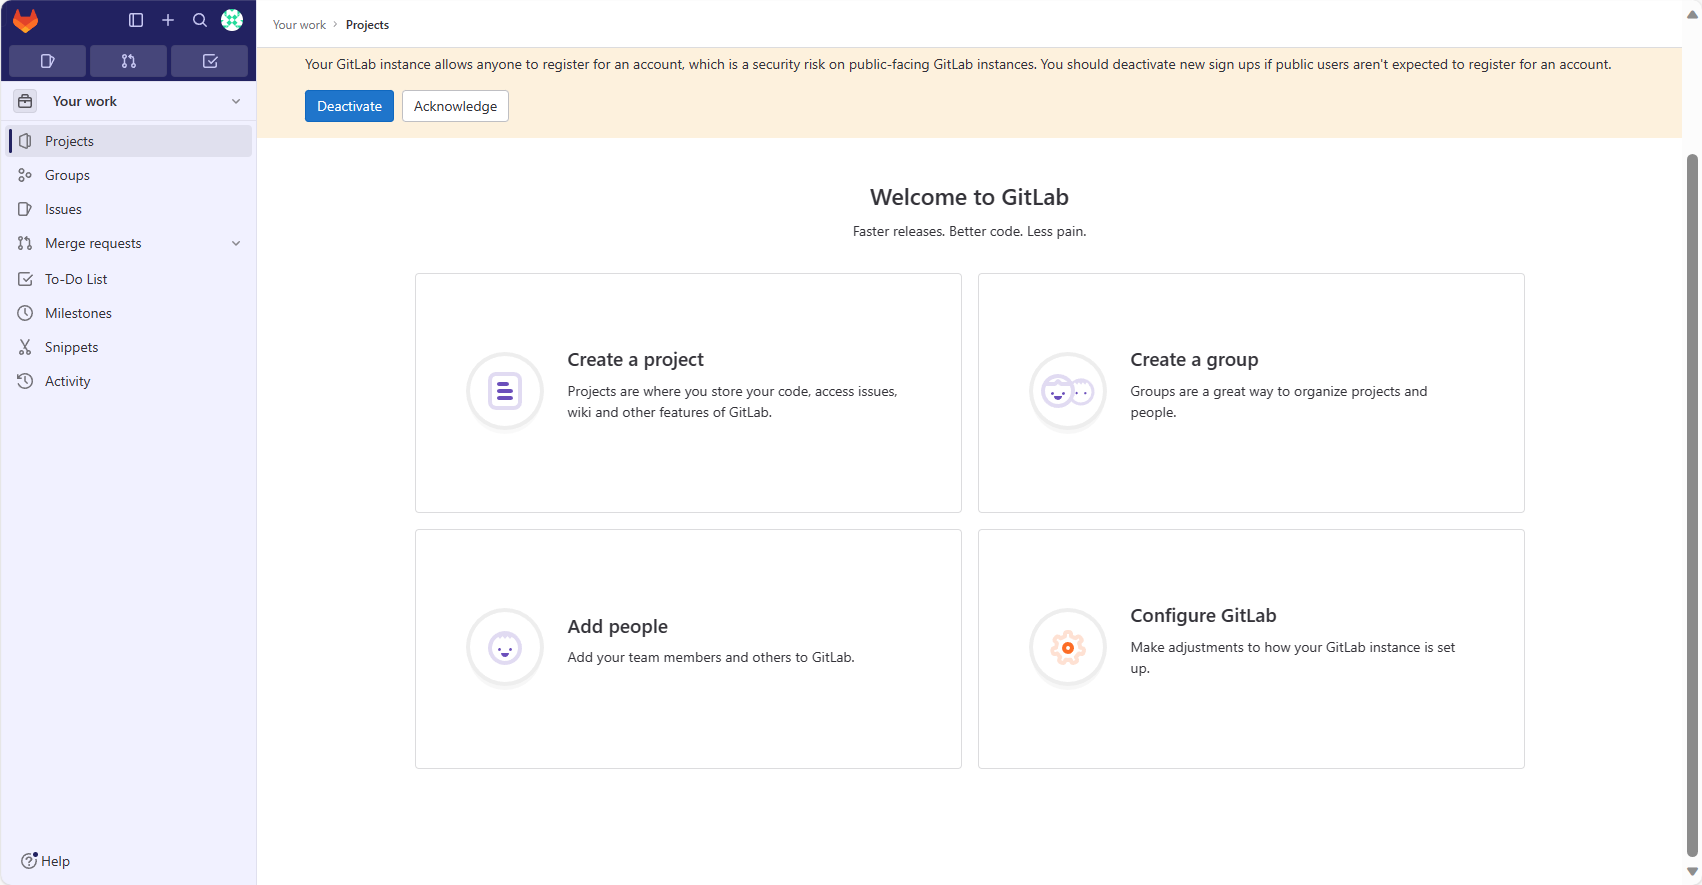
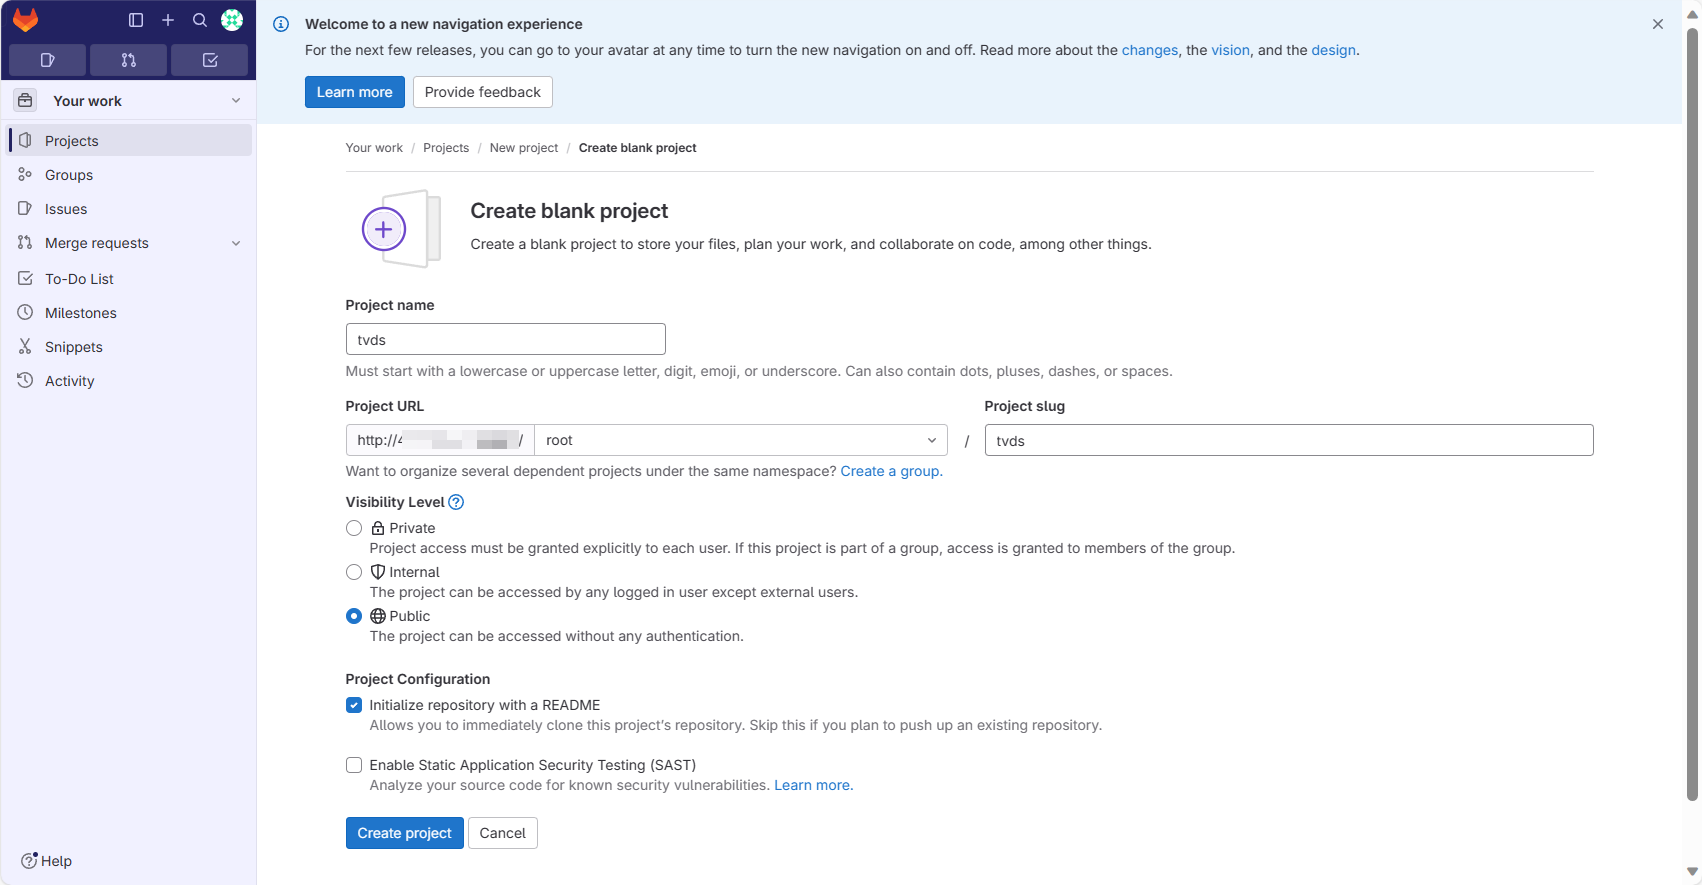
创建项目
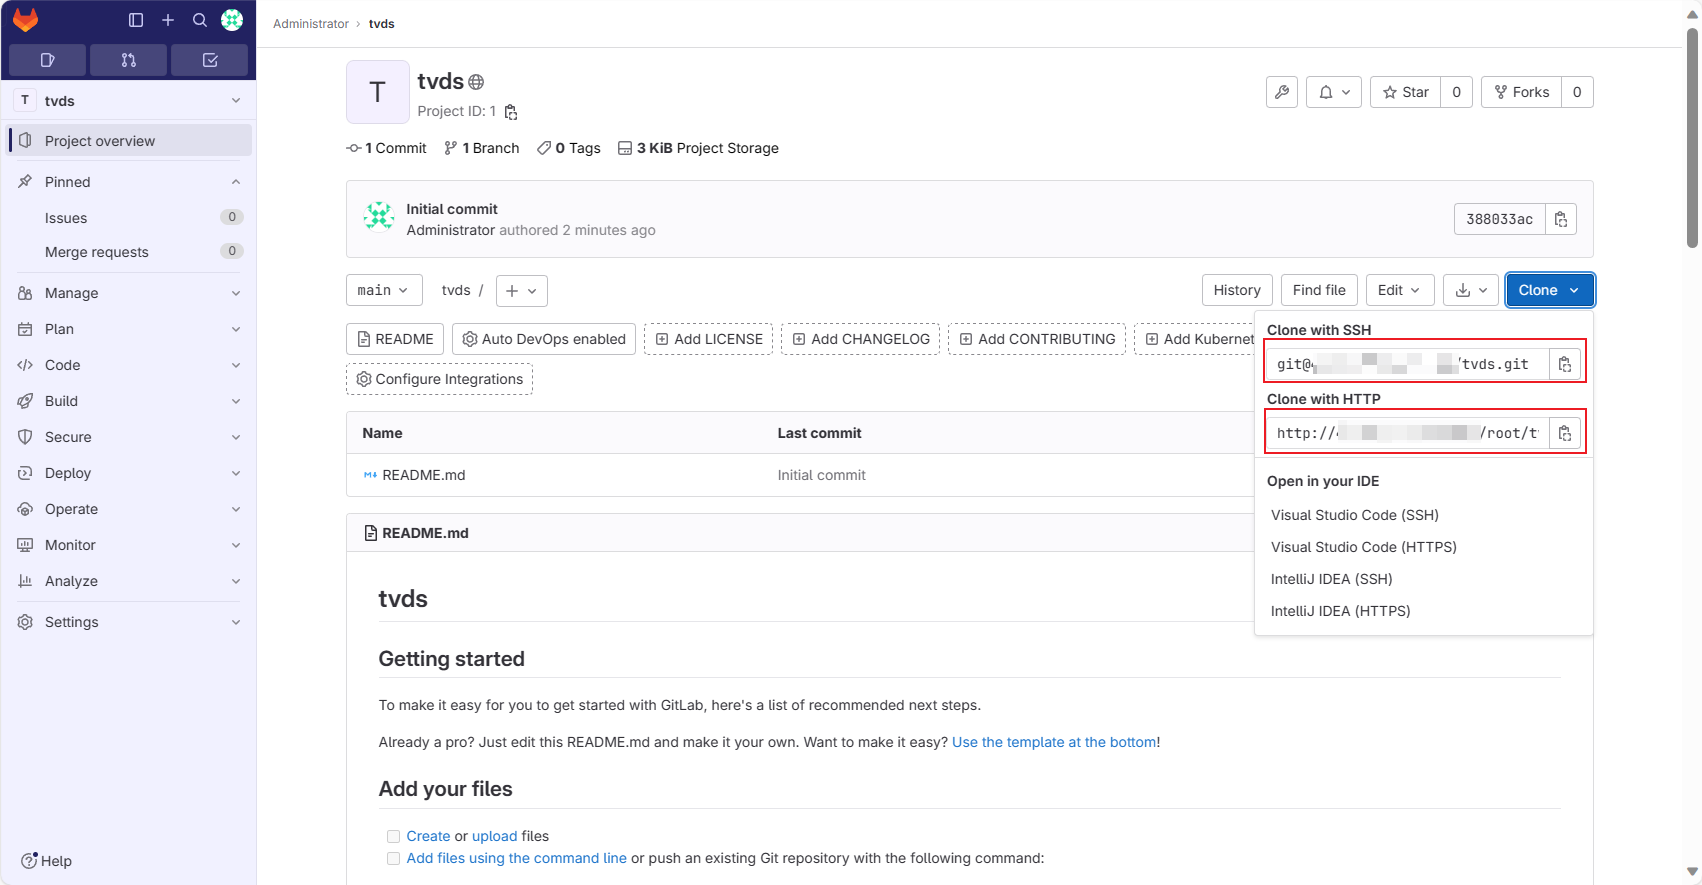
添加 SSH

最后使用两种方式克隆项目,进行开发即可
# CentOS
CentOS 7.6
# 依赖配置
sudo yum install -y curl policycoreutils-python openssh-server perl
系统防火墙中打开 HTTP、HTTPS和 SSH访问 (可选,不设置则只能从本地网络访问 )
sudo systemctl enable sshd
sudo systemctl start sshd
sudo firewall-cmd --permanent --add-service=http
sudo systemctl reload firewalld
2
3
4
安装 Postfix 以发送电子邮件通知 (可选)
sudo yum install postfix
sudo systemctl enable postfix
sudo systemctl start postfix
2
3
其他配置基本类似,这里不再赘述
# Codeup 平台
平台官网:云效代码管理 Codeup_代码托管_企业级代码管理平台-阿里云 (aliyun.com) (opens new window)
阿里云-云效 Codeup 是一款企业代码托管平台,支持在线编写和在线 web IDE,非常适合大型企业及小型团队编写进行代码托管
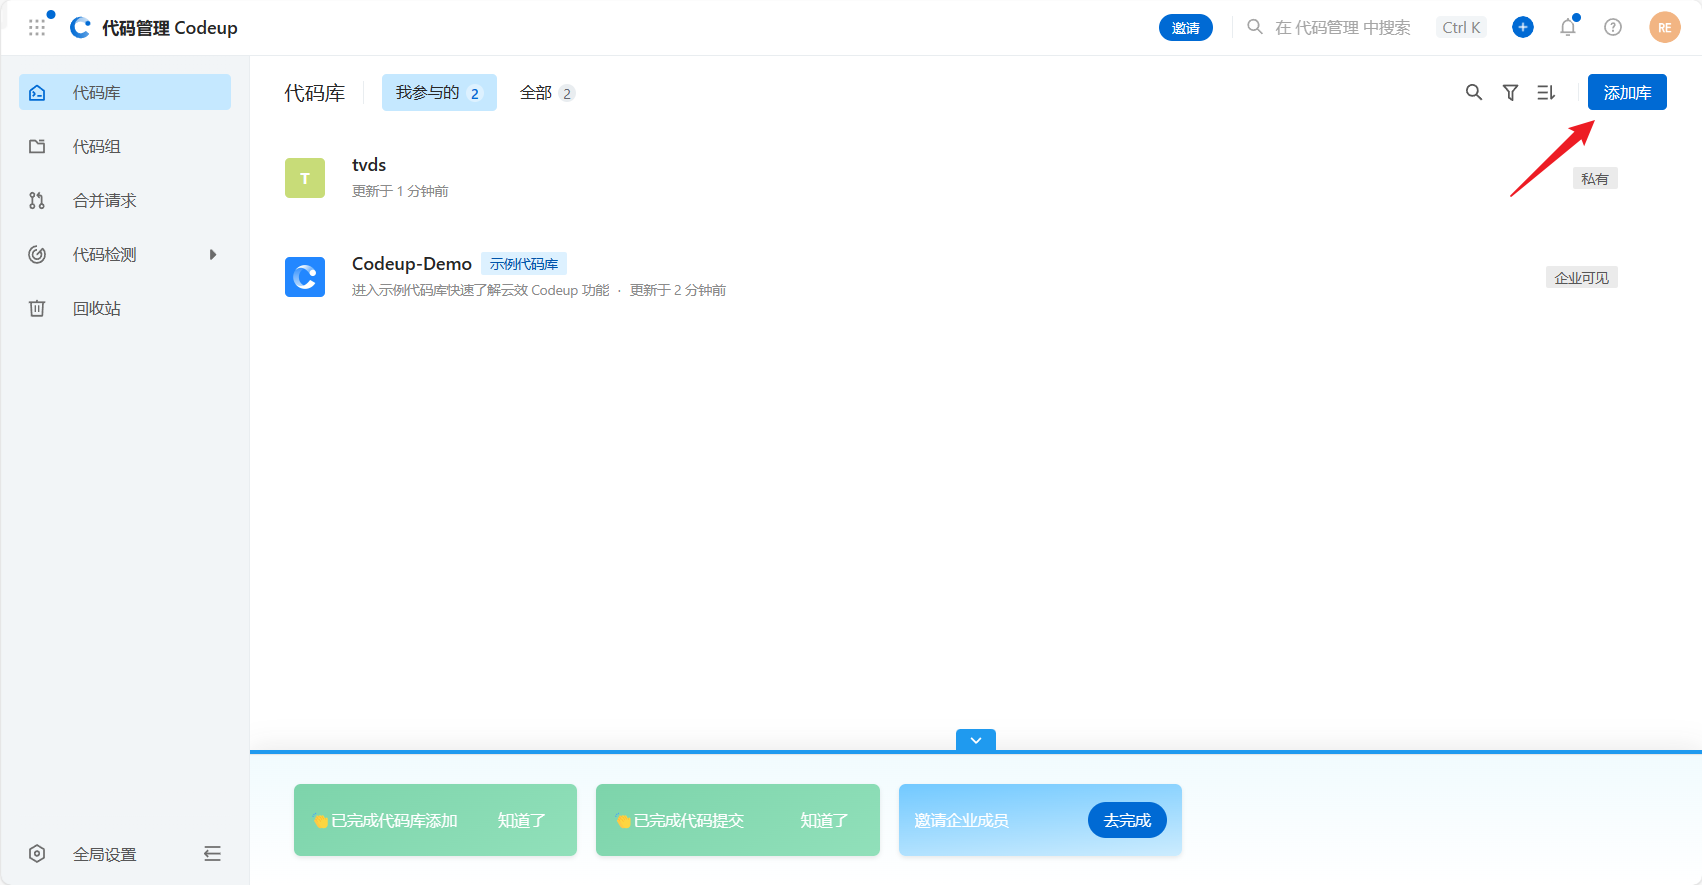
# 创建代码库
首先我们注册成功之后会进入控制台,我们点击添加库创建代码库
# 配置 SSH
下面我们主要是使用 SSH(RSA) 的方式讲解如何管理代码库
# 查看密钥
cat ~/.ssh/id_rsa.pub
可以查看到密钥即可跳过第二步
# 生成密钥
ssh-keygen -t rsa -C "<注释内容>"
# 复制密钥(winodws)
cat ~/.ssh/id_rsa.pub | clip
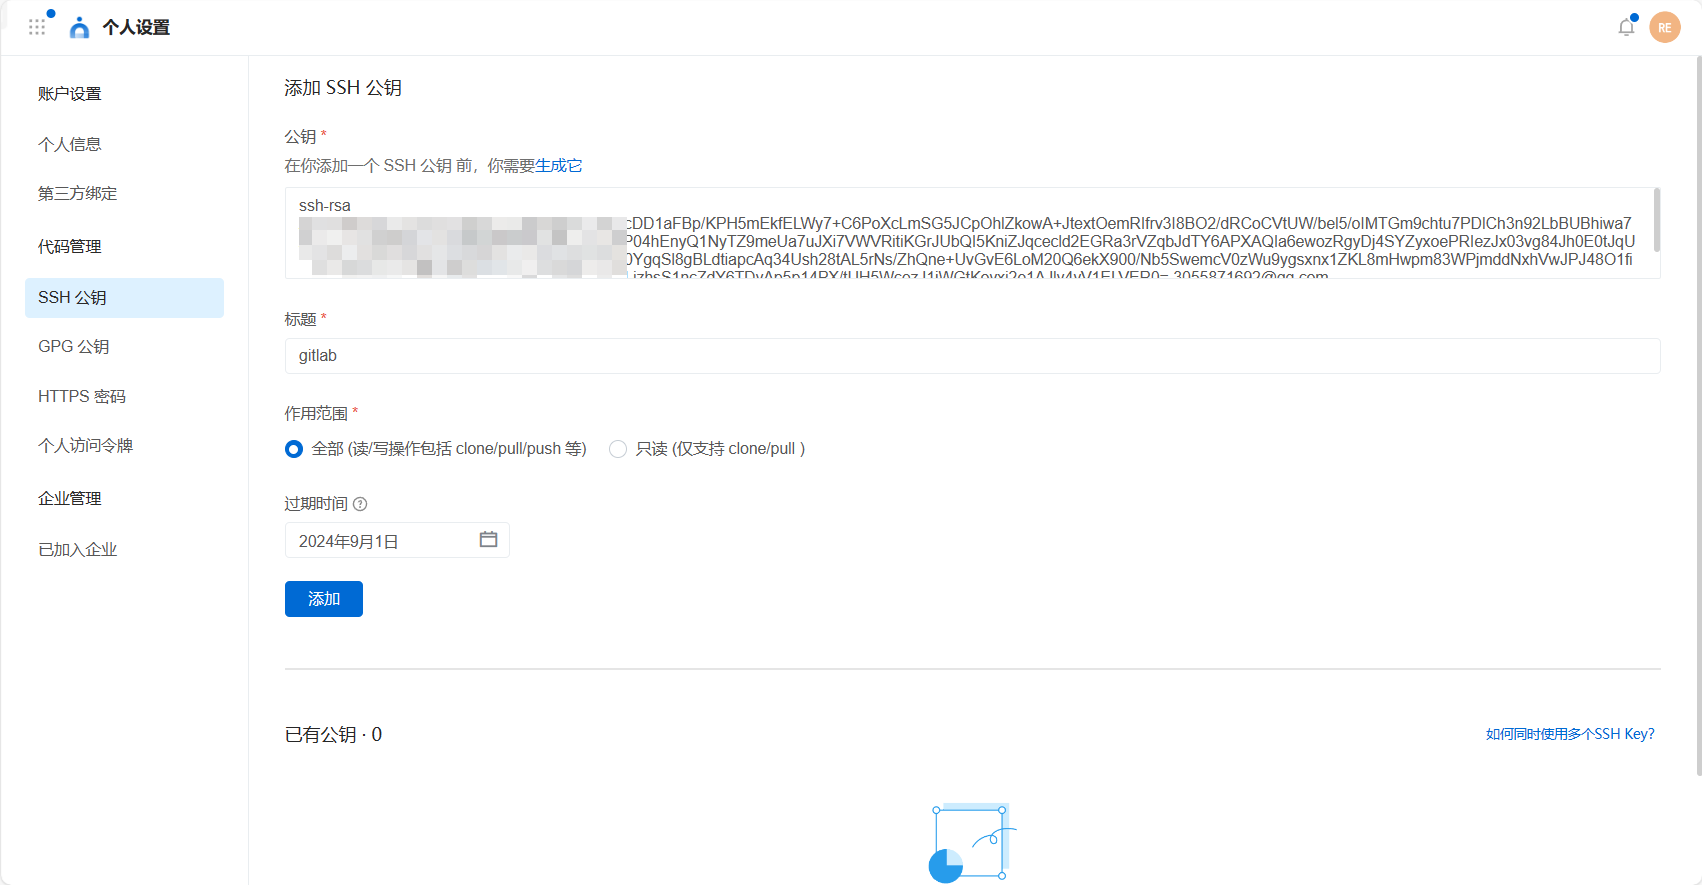
# 设置平台公钥
# SSH 公钥配置
配置页面:个人设置 (aliyun.com) (opens new window)
之后我们就可以连接 SSH 操作远程仓库了
# 多密钥配置
编辑 ~/.ssh/config
# Codeup 示例用户1
HostName codeup.aliyun.com
  PreferredAuthentications publickey
  IdentityFile ~/.ssh/id_ed25519

# Codeup 示例用户2,设置别名 codeup-user-2
Host codeup-user-2
HostName codeup.aliyun.com
  PreferredAuthentications publickey
  IdentityFile ~/.ssh/codeup_user_2_ed25519

# GitLab 平台
HostName gitlab.com
  PreferredAuthentications publickey
  IdentityFile ~/.ssh/gitlab_ed25519
2
3
4
5
6
7
8
9
10
11
12
13
14
15
按照上述配置,使用SSH协议访问时,SSH 客户端会使用文件指定的密钥进行认证,实现访问不同平台或同一平台的不同账号使用本地不同的 SSH 密钥进行认证。
- 访问 Codeup ,由于 HostName 一致,使用别名进行区分使用不同的密钥。
- 访问 GitLab,根据 HostName 进行区分使用不同的密钥。
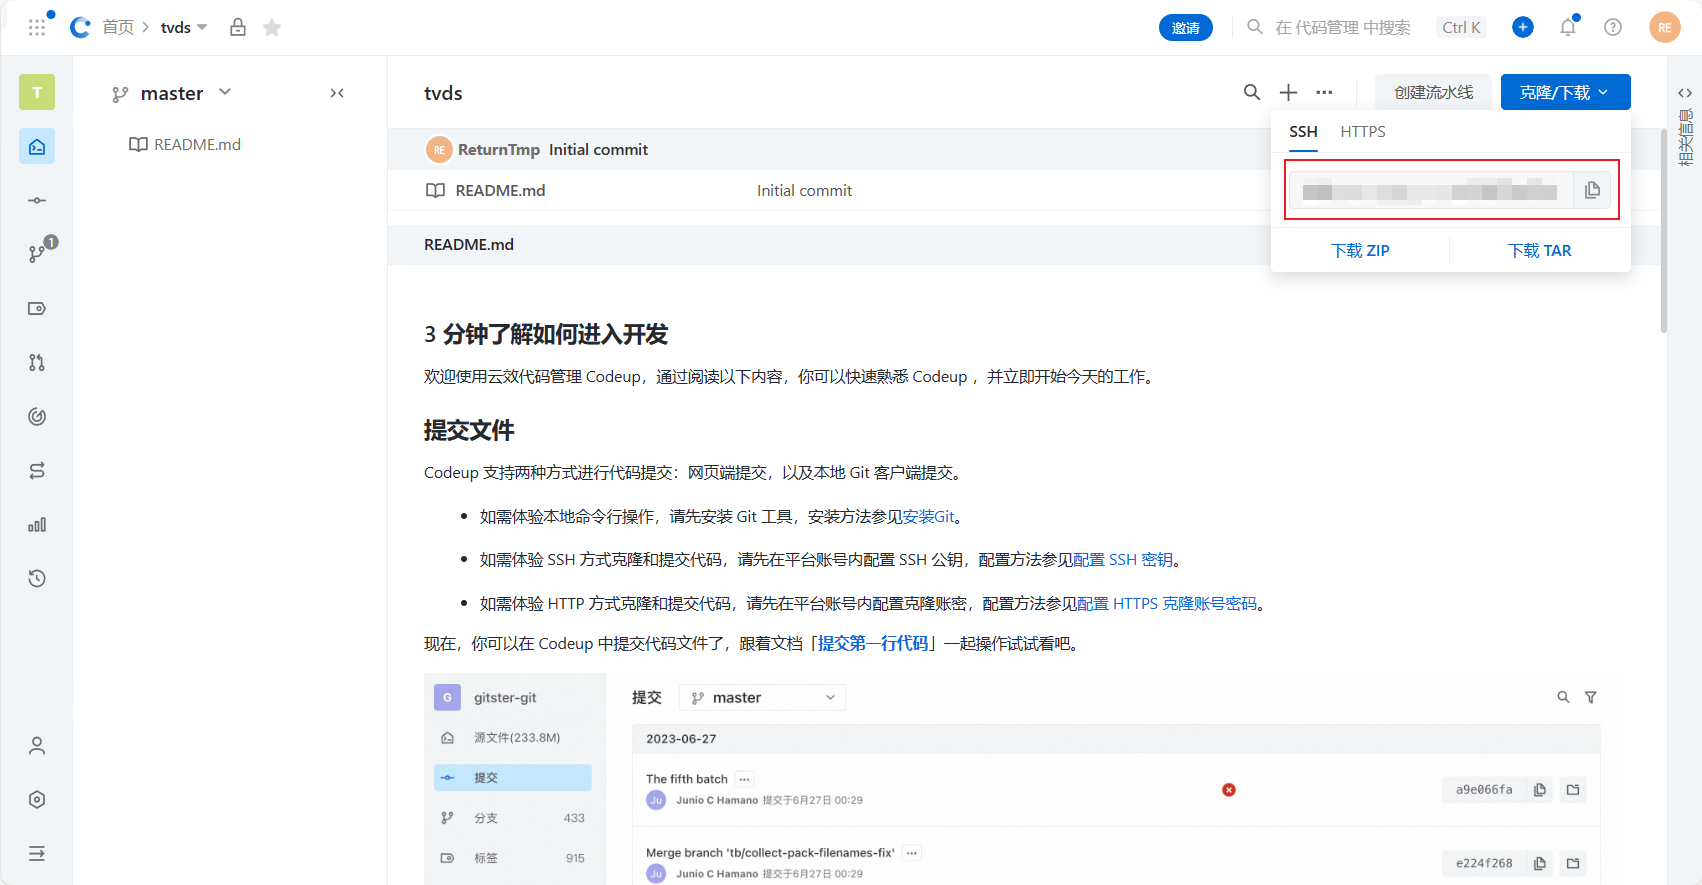
# 访问 Codeup,将使用 ~/.ssh/id_ed25519.pub 密钥
git clone git@codeup.aliyun.com:example/repo.com

# 以 codeup-user-2 别名访问 Codeup 时,将使用 ~/.ssh/codeup_user_2_ed25519 密钥
git clone git@codeup-user-2:example/repo.com

# 访问 GitLab 平台,将使用 ~/.ssh/gitlab_ed25519 密钥
git clone git@gitlab.com:example/repo.com
2
3
4
5
6
7
8
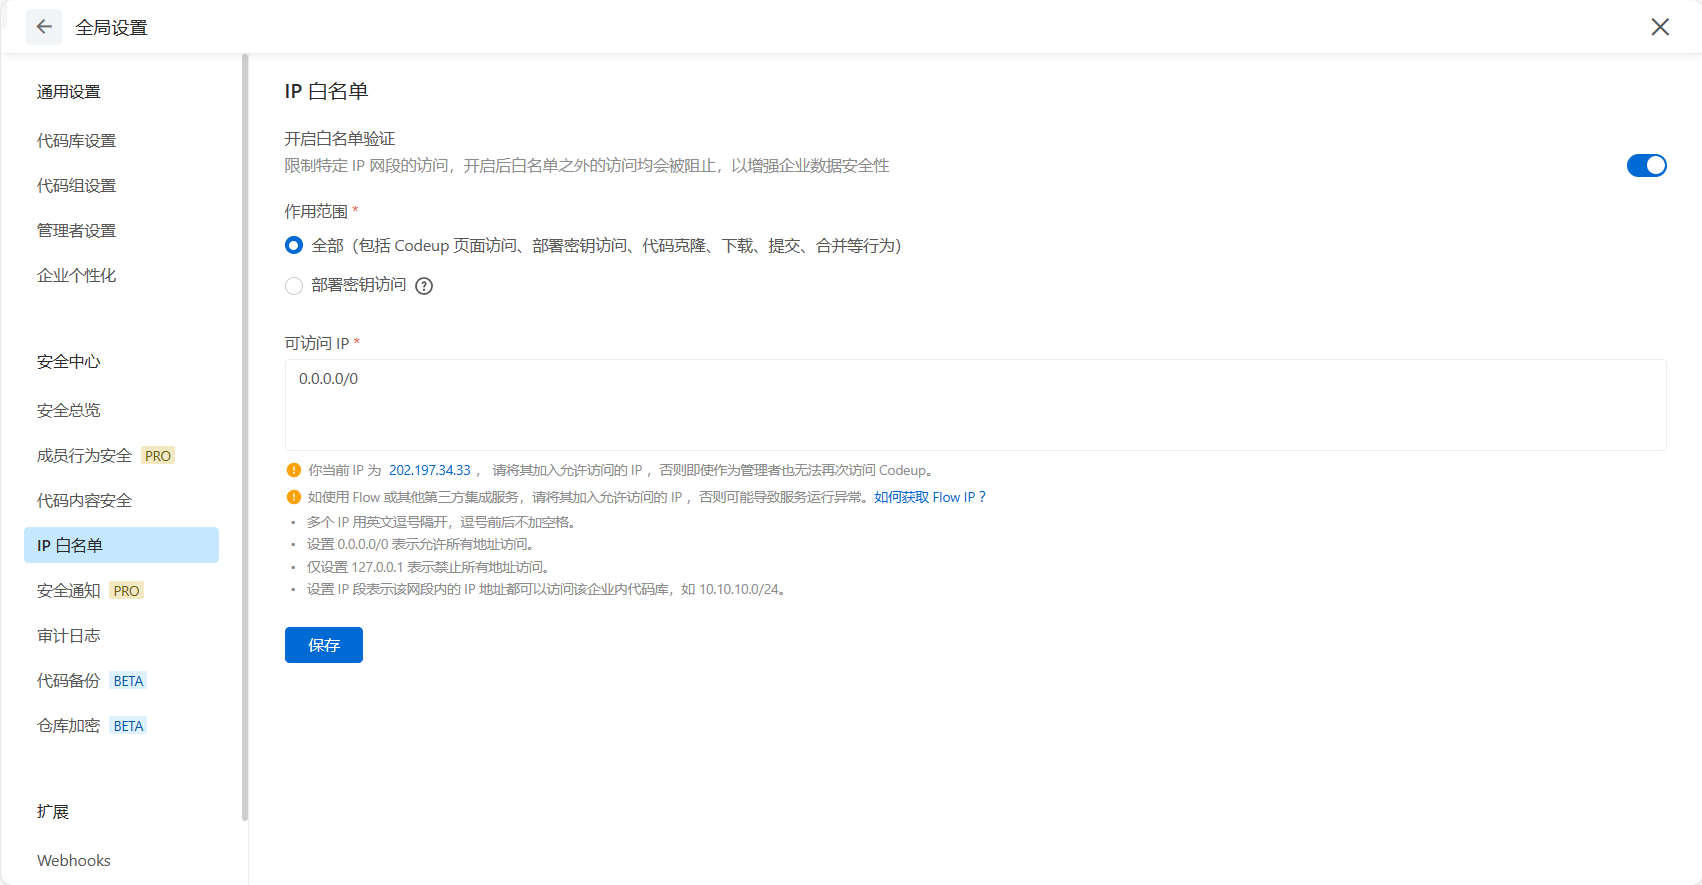
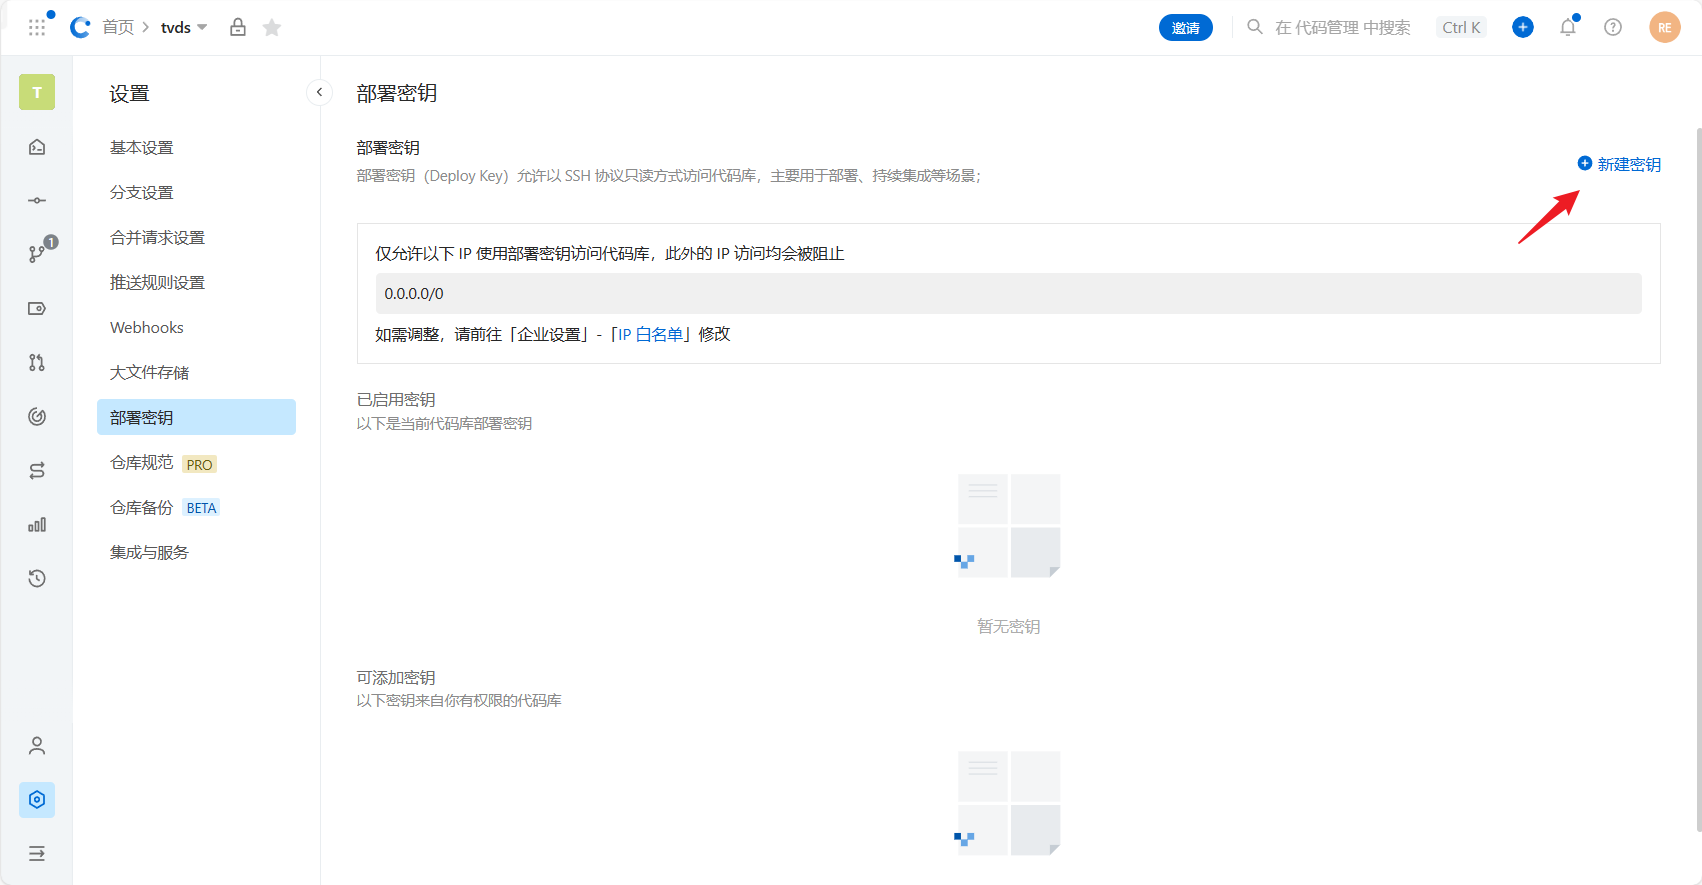
# 部署密钥(可选)
开启企业白名单
网址:安全设置 · Codeup (aliyun.com) (opens new window)
新建密钥,然后粘贴公钥
注意:此公钥不可与上面的 SSH 公钥相同
# 参考文章
搭建GitLab私服详细步骤_git私服_晴空๓的博客-CSDN博客 (opens new window)
Git学习笔记之搭建私服-腾讯云开发者社区-腾讯云 (tencent.com) (opens new window)
Ubuntu 18.04搭建GitLab私服_gitlab 服务器搭建 ubuntu18_沙漠中的独行者的博客-CSDN博客 (opens new window)
linux中安装Gitlab服务器后登录报错502解决办法(图文结合)_青山孤客的博客-CSDN博客 (opens new window)
gitlab-ce-10.0.2版本升级到15.4.2 - 掘金 (juejin.cn) (opens new window)